Easy Homemade Rolls are soft and fluffy. The smell that will fill your home as these rolls bake is amazing. There is no reason to be intimidated by bread making because this recipe is as easy as they get.


Easy Homemade Rolls are soft and fluffy. The smell that will fill your home as these rolls bake is amazing. There is no reason to be intimidated by bread making because this recipe is as easy as they get.
Fresh Strawberry Pie is the best way to enjoy strawberry season. The sweet and refreshing strawberries are piled high in a rich flaky pie crust and then topped with light and fluffy homemade whipped cream.

Whenever I make this pie, I always take a slice to my dad. He loves fresh strawberry pie. I can remember as a kid going to a restaurant for his birthday and the staff bringing out a strawberry pie and singing Happy Birthday to him. Then, we all had a slice of the pie. I remember not being too impressed with it and thinking strawberry pie just wasn’t my thing. What I didn’t realize at the time is that it was the pre-made glaze that I didn’t like, not the pie itself.

Well, this recipe does not have pre-made glaze. The glaze is made from scratch and it is so simple to make! Instead of taking away from the fresh strawberry flavor like the pre-made glaze does, this glaze boosts the strawberry flavor even more.
With the combination of homemade pie crust, fresh strawberries, homemade glaze, and homemade whipped cream, this pie is a recipe for instant happiness!
Until next time,
Carrie

makes 8 servings
1 baked and cooled pie crust (try my favorite flaky pie crust)
5 cups of fresh strawberries, washed and quartered
1 cup of water
3 1/2 tbsp. cornstarch
3/4 cup of sugar
1 1/2 cup of heavy cream
1/4 cup of sugar
1 tsp. vanilla extract
Instructions:
1. Combine 1 cup of sliced strawberries and 2/3 cups of water in a medium-sized pan. Over medium-high heat, bring to a boil and simmer for 3 minutes. Mash the strawberries with a wooden spoon and turn the heat down to medium-low heat.
2. In a bowl, mix the remaining 1/3 cup of water with the sugar and cornstarch. Whisk in sugar/cornstarch mixture into the hot strawberries mixture. Simmer the mixture for 3 to 4 minutes until thickened and translucent. Cool completely.
3. Gently toss the remaining strawberries into the strawberry glaze. Pour the strawberry mixture into the pie crust. Place some plastic wrap over the pie. Place it in the fridge to set up for 2 hours.
4. Beat the Heavy cream, 1/4 cup sugar, and vanilla extract in a medium-sized bowl until it forms stiff peaks. Pipe the whipped cream onto the strawberry pie and serve.
This recipe was originally posted on May 13, 2014.
Here are a few other pie recipes you might enjoy.


Fresh Strawberry Pie is the BEST pie ever! The fresh sliced strawberries and the homemade glaze is incredibly amazing! The strawberry filling and flaky crust topped with whipped cream makes this pie the BEST there is!
Maple Roasted Pecan Yams practically melt in your mouth. They are crispy on the outside and silky smooth on the inside. Who knew vegetables could taste so good!

Maple Roasted Pecan Yams is a simple and easy recipe that everybody will eat…picky eaters and all! Moms love them because they are vegetables, easy to make, and so delicious! Kids love them because they have a sweet flavor and don’t taste like vegetables.

I am warning you that these yams are extremely addicting! The maple syrup and balsamic glaze rocks this dish and the sweet and salty combination simply can’t be beat!

When my husband tasted them, he said “this recipe is definitely a keeper”! So do yourself and your family a favor and make these Roasted Maple Pecan Yams this Thanksgiving!
*This is an affiliate link. Make sure to use a good quality, thick baking sheet when making these Maple Roasted Pecan Yams. I love Nordic Ware Natural Aluminum Baking Sheets.
With love from my kitchen to yours,
Carrie

4 1/2 to 5 cups (about 2 lbs.) of yams, peeled and cut into 1 inch cubes
1/2 cup of pecans
1 tsp. of kosher salt
1 tbsp. of olive oil
1/2 cup of maple syrup
2 tbsp. of balsamic vinegar
Instructions
Preheat oven to 400 degrees
1. In a medium bowl, toss the yams, pecans, oil, and kosher salt together. Spread the yams and pecans out evenly on a baking sheet. Place in the oven and cook for 20 minutes.
2. Turn the yams and pecans over and place them back in the oven and bake for another 15 minutes. While the yams are baking in the oven, pour the maple syrup and balsamic vinegar in a small sauce pan and bring to a boil. Continue to boil the syrup until it reduces by half and thickens, stirring occasionally.
3. Remove the pan of yams from the oven and drizzle the maple syrup glaze over the yams. Gently toss to evenly coat. Return to the oven and bake for an additional 5 minutes. Remove from oven and serve immediately.
This recipe was originally posted on November 17, 2014.
Here are a few other recipes you should try.

Creamy Crock Pot Mashed Potatoes

Autumn Harvest Salad with Creamy Pumpkin Dressing
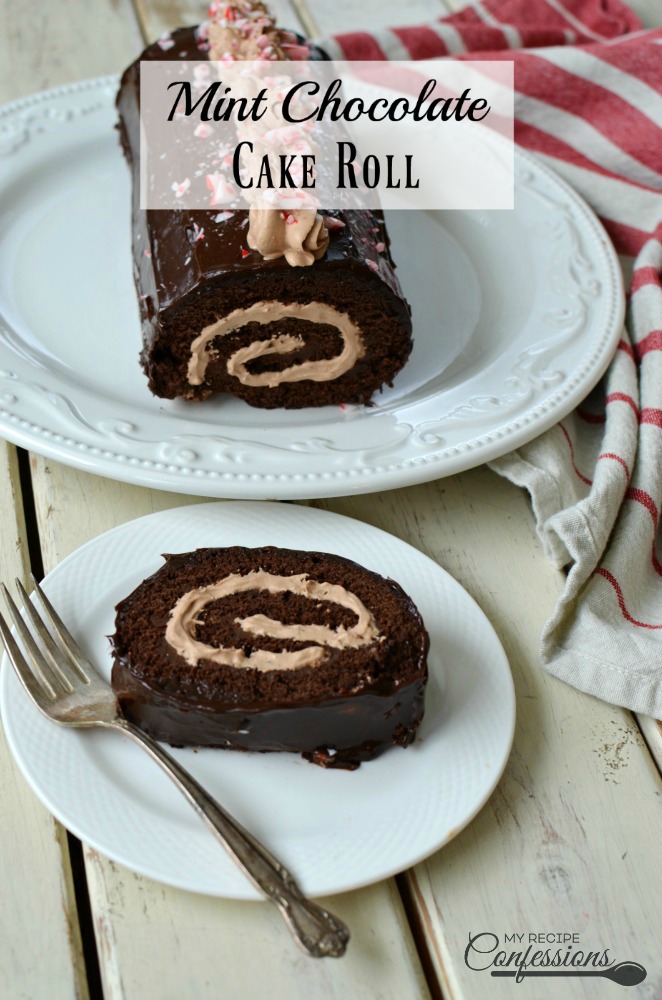
Mint Chocolate Cake Roll is what dreams are made of! At least my dreams are anyways. I am a sucker for a rich, moist, chocolate cake. I hate to admit it, but I think about chocolate cake daily and this Mint Chocolate Cake Roll is just as amazing as it sounds
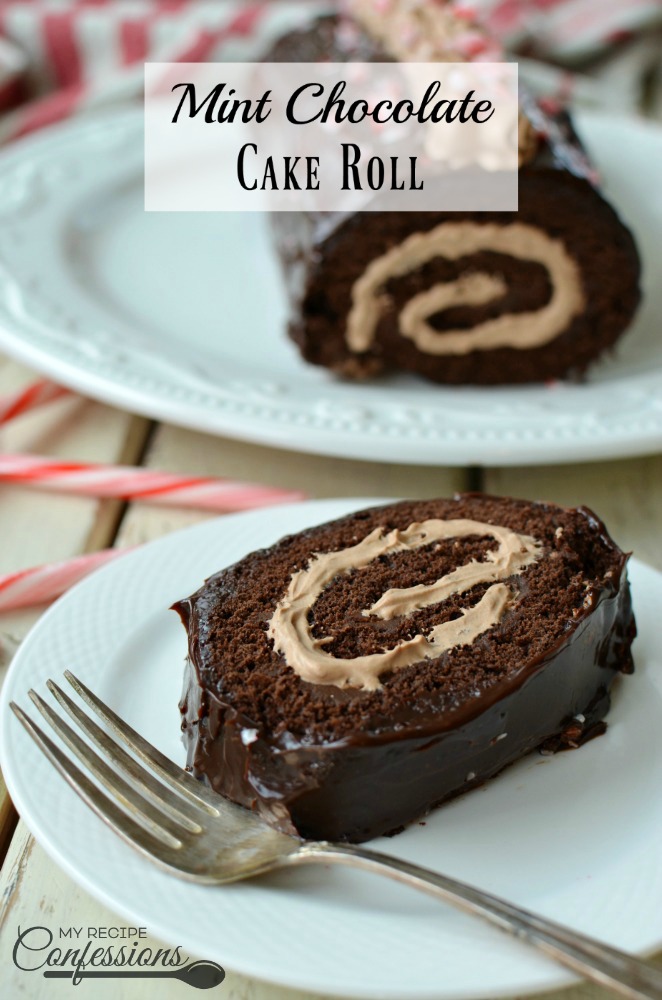
This moist chocolate cake is first filled with a smooth mint chocolate ganache and then a fluffy mint chocolate mousse. The cake is rolled up and then covered in more mint chocolate ganache. It case you were wondering, it is the most amazing cake ever!

If you know me, you know that mint and chocolate are my favorites, especially around the holidays. You can make this cake a day ahead. In my opinion, it tastes even better the next day.
With love from my kitchen to yours,
Carrie
3/4 cup all-purpose flour
1/4 cup cocoa powder
1 tsp. baking powder
1/4 tsp. salt
5 large eggs, room temperature
3/4 cup granulated sugar
powder sugar, to aid in rolling the cake
Instructions
Pre-heat oven to 350 degrees.
1. Line a 18 x 13 inch rimmed baking sheet with parchment paper. Spray the parchment paper with cooking spray.
2. Whisk the flour, cocoa powder, baking powder, and salt together in a medium bowl.
3. In a large bowl, whip the eggs with an electric mixer on medium speed and gradually add the sugar and then the vanilla, about 1 minute. Continue to whip the mixture until very thick and voluminous, 4 to 8 minutes.
4. With the electric mixer still on, gradually add the flour mixture to the egg mixture.
5. Scrape the batter into the prepared baking sheet and spread it out in an even layer. Bake the cake until it feels firm and springs back when touched, 15 to 20 minutes or until a toothpick inserted into the center comes out clean. Rotate the pan halfway through baking.
6. Remove the cake from the oven. Lay a clean dish towel (I found a tea towel works best) out on the counter and dust with powder sugar. Holding onto the parchment paper, carefully remove the cake from the hot pan.
7. Place the cake face side down on the dish towel. Gently peel the parchment paper off of the cake. Starting from the short end, roll the cake and dish towel snugly into a log. Let the cake cool completely. While the cake is cooling, make the mint chocolate ganache and mousse.
1/2 tsp. vanilla extract
1 (12 oz.) bag of semi-sweet chocolate chips
3 tsp. of peppermint extract
3 cups of heavy whipping cream
6. Place the chocolate chips in a medium-sized bowl. In a small sauce pan, bring 1 cup of heavy cream to a simmer. Pour the hot cream over the chocolate chips and stir until smooth and creamy.
7. Stir in 2 tsp. of peppermint extract into the chocolate ganache. Pour 1 cup of the ganache into another bowl. Cover both bowls of ganache with plastic wrap. Set one bowl of ganache aside and place the other bowl in the fridge to chill for the chocolate mousse.
8. Pour 2 cups of heavy whipping cream and the remaining 1 tsp. of peppermint extract into the chilled bowl of ganache. Whip until the mousse forms stiff peaks.
1. Unroll the cooled cake and remove the towel. Spread a layer of chocolate ganache over the cake. Spread a layer of chocolate mousse over the top of the ganache. Gently roll the cake up and place seam side down on a platter. Spread the remaining ganache over the cake. Add a little chocolate mousse on top of cake to top it off.
3. Sprinkle crushed peppermint candy on top if so desired. Keep the cake chilled until ready to serve.
Here are a few other recipes you might enjoy.

White Chocolate Peppermint Cookies

Flourless Mint Chocolate Cupcakes

Double Chocolate Candy Cane Kiss Cookies
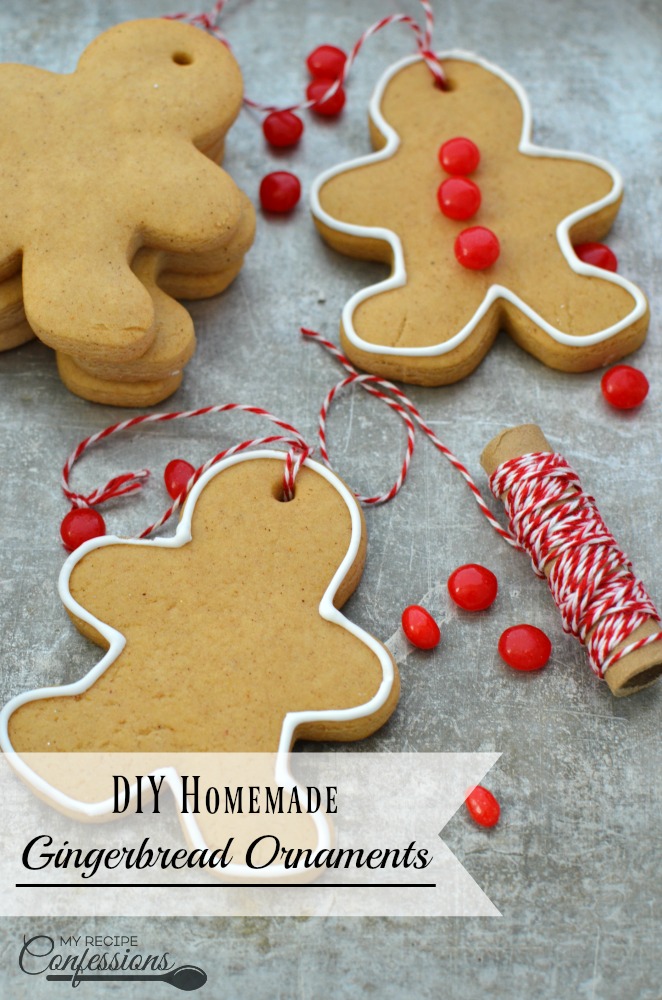
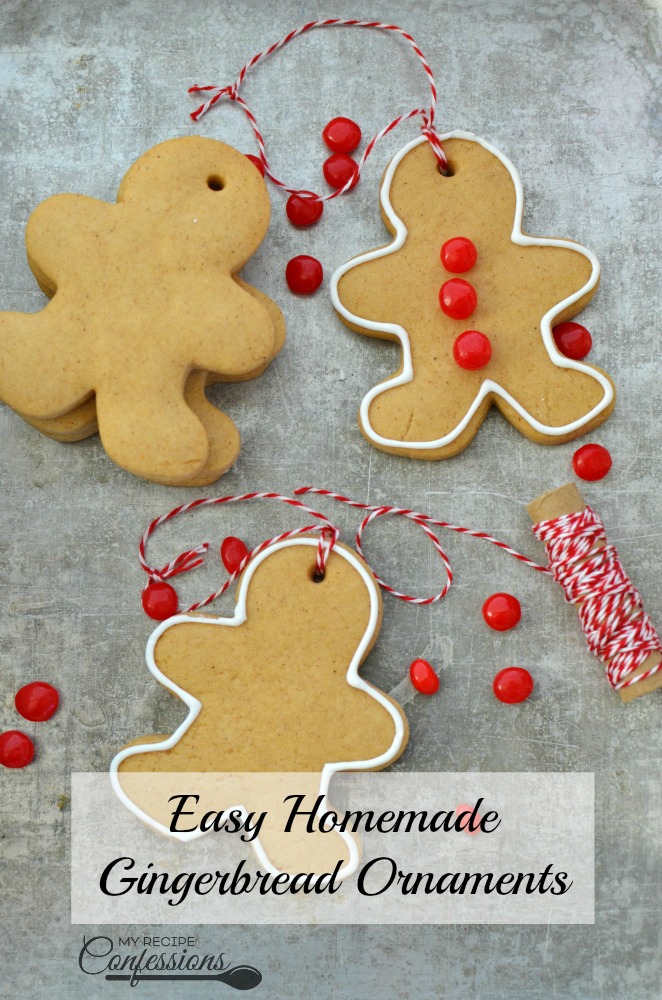
Easy Homemade Gingerbread Ornaments are a fun Christmas craft to make with your family. I love how easy and kid friendly these ornament are. One batch goes a long way. This recipe can also be used to make a gingerbread house.
For a darker color gingerbread use dark brown sugar and dark syrup. When rolling out and cutting the gingerbread, make sure to keep the extra dough wrapped in plastic wrap because it will dry out quickly. If it does dry out, just place the wrapped gingerbread in the microwave for 30 seconds or until it is warm. Then continue working with the dough the same as before.
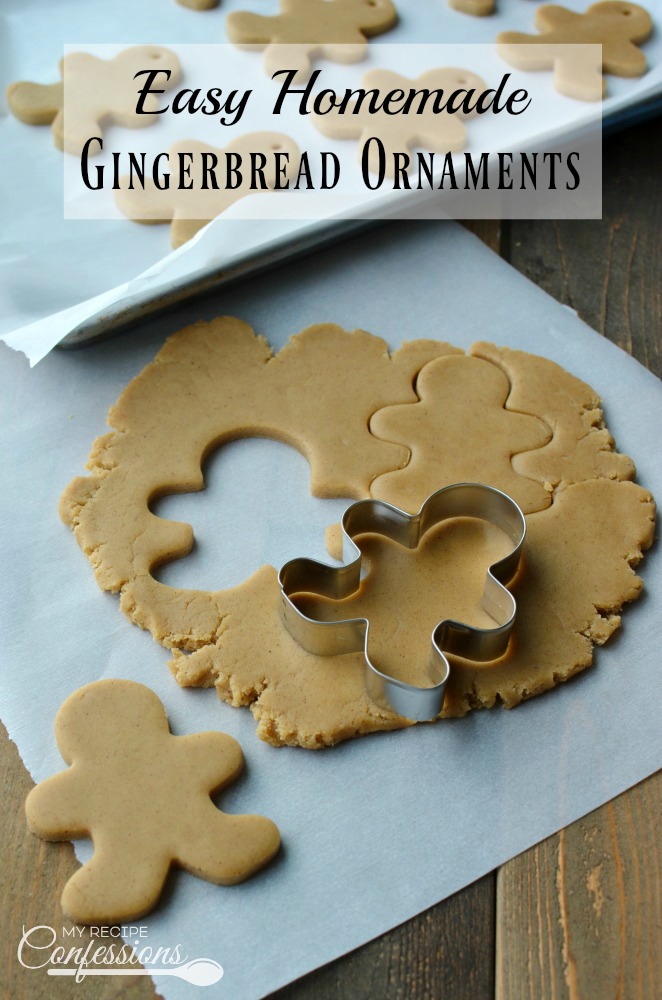
The ornaments are made the same way you make sugar cookies by rolling them out and cutting them with cookie cutters. My kids loved helping cut out all the fun shapes for their ornaments. They can be left plain or can be decorated with candy and royal icing (see recipe below). I know you will love the delicious aroma that will fill your house while you bake these ornaments.
With love from my kitchen to yours,
Carrie
6 3/4 cups of all-purpose flour
1 tbsp. of cinnamon
1 1/2 tsp. of ginger
1/2 tsp. of ground cloves
1/2 tsp. of salt
1 1/2 cup of corn syrup
1 1/4 cup of brown sugar
1 cup of butter
Supplies:
Bakers twine or jute
Christmas cookie cutters
Plastic drinking straw
Instructions
Pre-heat oven to 350° fahrenheit
2 cups of powder sugar
1/8 tsp. of cream of tartar
3 egg whites at room temperature (or 3 tbsp. of meringue powder and 3 tbsp. of water mixed together)
Instructions
This recipe is adapted from Gingerbread Things to Make and Bake by Teresa Layman and Barbara Morgenroth
Here are a few other recipes you should try.

Soft and Chewy Gingerbread Cookies

White Chocolate Peppermint Cookies
White Chocolate Peppermint Cookies are one of the best holiday cookies! They are soft and chewy with the perfect peppermint kick and the white chocolate is the perfect compliment. This recipe makes about 3 1/2 dozen cookies. So there will be plenty of cookies to share with your family or plenty to share at your next Christmas cookie exchange party.

My neighbor Nancy brought us some of this candy for Christmas. As soon as I tasted it, I texted her and asked for the recipe. I couldn’t stop thinking about it so the next morning I ran to the store to buy the ingredients. This recipe makes a large pan and I couldn’t keep my hands off of it. So I started giving it away to everybody around me.

We love English toffee around here. My siblings love it so much that they often beg me to make it for them. My husband’s Grandma Swenson had an amazing recipe that I use. But sometimes, I just don’t want to spend the time to make it. So that is where this recipe comes into play.
These Soft and Chewy Gingerbread Cookies are the very essence of Christmas! Your kitchen will be filled with the amazing smell of Christmas as you bake your tasty gingerbread men. The cream cheese frosting is the perfect addition to the already amazing cookies.
This Soft and Chewy Gingerbread Cookie recipe took me 5 batches to perfect it. They were either too dry and flavorless or flat crispy and loaded with flavor. I wanted a gingerbread cookie that was moist and fluffy and packed with flavor. Five batches later, I have just that cookie. My kids were in heaven with all the cookies I was making.
So here’s to these amazing gingerbread cookies that will help make your Christmas complete!
With love from my kitchen to yours,
Carrie

1 cups of butter, softened
1 cup of dark brown sugar
½ cup of granulated sugar
2 eggs
1 egg yolk
1/2 cup of molasses
1 tsp. of vanilla
1 tbsp. of sour cream
4 1/2 cups of flour
1 tsp. of baking soda
½ tsp. of salt
3 tsp. of cinnamon
1 1/2 tsp. of ground ginger
2 tsp. of ground cloves
Instructions
Pre-heat oven to 350 degrees
2 oz. of cream cheese, softened
1/4 cup of butter, softened
2 cups of powder sugar
3 tbsp. of milk
1 tsp. of vanilla
Instructions
Here are a few other Christmas Cookies you should try.
Double Chocolate Candy Cane Kiss Cookies

Triple Chocolate Peppermint Sugar Cookies

Cranberry Pumpkin Cookies with Orange Glaze
Soft and Chewy Gingerbread Cookies are the best holiday treat! This recipe is easy and the cookies don’t spread and they stay soft for days. It’s a fun Christmas tradition to decorate them with the family.

Thanksgiving can be very stressful, trust me I know. It is always hard trying to find the right recipes for your dinner. So I thought I would help you out a little bit.
Homemade Apple Pie is the best apple pie you will ever taste! Everything about this pie is amazing, from the made from scratch flaky crust, and vibrant apple filling, to the sweet glaze drizzled on top of the pie before it is baked. You won’t find a better apple pie recipe than this one!

Nothing beats Homemade Apple Pie! Especially on Thanksgiving. However, it is a pie that takes a little bit longer to make, but it is definitely well worth the time!
This Homemade Apple Pie is like the classic apple pie that your grandma use to make. The caramel sauce that it poured on top of the pie before it is baked leaves a light glaze on the top of the pie as well as a rich caramel sauce throughout the pie. It is heavenly! My favorite way to eat this pie is hot out of the oven with a scoop of vanilla ice cream on top. But don’t take my word for it, try it out yourself.
With love from my kitchen to yours,
Carrie

2 batches of Flaky Pie Crust recipe for a 9 inch pie pan
7 medium granny smith apples, peeled and thinly sliced
1 tbsp. of lemon juice
zest of 1 lemon (about 1 tbsp.)
2 tsp. of cinnamon
1/8 tsp. of ground cloves
1 tbsp. of granulated sugar
1. In a large ziploc bag or bowl, toss the sliced apples with the cinnamon, cloves, sugar, lemon zest, and lemon juice and set aside.
Preheat Oven to 425° fahrenheit
2. Prepare the flaky pie crust recipe following the instructions 1-4.
3. Remove one of the dough discs from the refrigerator and follow steps 5-8 in the flaky pie crust recipe. Place the pie on a baking sheet lined with tin foil (for easy clean up) and add the apples to the pie, mounding slightly in the center
4. Remove the second dough disc from the refrigerator. Unwrap the plastic wrap so that it is spread out on the counter. Place two more 12 inch sheets of plastic wrap over the top of the dough. Roll the dough out into a circle, rolling from the center to the edge. Turning clockwise and rolling to form an even circle about 1/8 of an inch thick and 11 inches in diameter.
5. Using a knife or pastry wheel, cut the dough into 1 inch strips. Lay the horizontal strips down over the pie first. Using the longest for the middle and the shortest for the end.

6. Fold every other strip back on itself. Starting in the middle, right next to the folded strip, lay a strip of dough vertically over the unfolded strips.
7. Swap the strips of dough by laying the folded strips down and fold the opposite strips over on themselves.

8. Lay another strip vertically over the horizontal strips. Making sure to leave a 1 inch space between the two vertical strips. Continue this process until you reach the edge of the pie. Then repeat on the other half on the pie and then shape edges as desired. Place the baking sheet with the pie in the fridge while you make the caramel sauce.


1/2 cup of butter
3 tbsp. of all-purpose flour
1/2 cup of water
1/2 cup of granulated sugar
1/2 cup of brown sugar
1/2 tsp. of vanilla extract
1.In a sauce pan over medium-high heat, mix the butter and flour together until the butter is melted and it forms a thick paste.
2. Stir in the water, brown sugar, granulated sugar, and vanilla. Bring to a boil and turn down the heat to medium-low. Simmer the sauce for 2 more minutes or until the sugar is dissolved.
3. Remove the pie from the fridge. Pour the sauce over the top of the pie. Place the pie in the oven and bake for 15 minutes at 425 degrees. Turn the heat down to 350 degrees and continue to cook for an additional 30-45 minutes until the apples are soft and the pie crust is golden brown. Remove from oven and allow to slightly cool before cutting.

This recipe was adapted from Apple Pie by Grandma Ople.
Here are a few pie recipes you might enjoy.


Pumpkin Cranberry Cookies with Orange Glaze all of the best holiday flavors wrapped into one recipe. The pumpkin and cranberries might sound weird, but trust me, once you try them you will be hooked. The orange glaze on top acts like the cookies wing man by rounding out the flavors and make them pop. It is like a Christmas party in your mouth.

This Raspberry Custard Pie reminds me of summer. Maybe it is because when I was a kid, each Summer I would pick raspberries in my grandpa’s garden. My mom would use the raspberries to make raspberry jam and other mouth watering raspberry desserts.

Easy Microwave Peppermint Bark is the easiest candy recipe you will make this holiday season. How can anybody refuse anything to do with candy canes and chocolate. It’s simply the best way to celebrate Christmas! This no-fuss candy is made in the microwave. Easy Microwave Peppermint Bark can be made in less than 15 minutes. You really can’t beat that!

When I was a kid, Santa always left me a box of See’s Candy Almond Clusters in my stocking. Santa has always been so good to me!
These candies are probably one of the easiest things you’ll ever make. There are only two ingredients. You can make them in under 10 minutes.

Who can argue with anything that has “double chocolate” in the title? These cookies are soft, chewy, and loaded with chocolate. As if things couldn’t get any better, it has a Candy Cane Hershey Kiss on the top. Come on, I dare you to try to stay away from these babies.

Every year for Christmas, my Grandma Cope would make us a plate of peanut brittle, English toffee, homemade caramels, and homemade hard suckers. I always looked forward to her homemade candy! She is the candy expert.
When I got a little older, sometimes my sisters and I would go and “help” her make candy. She is such a sweetheart and is always happy to answer any cooking questions I might have.
My grandma is now 95 years old. She has arthritis so bad now that she no longer cooks. So now I get to make the candy for her.

My husband’s Grandma Swenson was known for her English Toffee. I never met his sweet grandma but my mother in law taught me how to make this recipe when Dave and I first got married. Trust me when I say that there is a reason that this recipe has been passed down from one generation to the next!
When I make candy, I don’t like to use a candy thermometer. I don’t think that they are as accurate as the cold water method and they always get in the way. This is also the method that my Grandma Cope taught me to use.
Soft Homemade Caramels are rich and creamy and practically melts in your mouth. This tried and true recipe is definitely one you want to hang onto.


Old Fashioned Pumpkin Pie is what makes Thanksgiving dinner complete! This pie tastes just like your grandma’s pumpkin pie. It’s everything you have ever wanted in a classic Thanksgiving dessert!

Banana Cream Pie is one of my favorite pies! Thanksgiving is not Thanksgiving without pie! This recipe makes a silky smooth vanilla custard that goes perfectly with the banana layers. Then pared with the flaky pie crust and the homemade whipped cream, you have a recipe for true happiness!

What do you do with all the leftover Thanksgiving turkey and stuffing? Do you get a little overwhelmed with all that food? My mother in law makes a great dish with her leftover turkey and stuffing. She likes to use cream of chicken soup, but I like to make my own sauce.

Five years ago my life was forever changed when my wise cooking instructor Tony introduced me to the wonderful world of brined turkey. Brined turkey is extremely moist and loaded with flavor! The white meat is just as moist as the dark meat. Even when you warm up the left over turkey a few days later, it is still moist. Seriously, it’s magical!


Do you need an crowd pleasing cookie recipe this holiday season? Nothing screams Christmas like the heavenly combination of peppermint and chocolate. This recipe starts out with a super soft chocolate sugar cookie. Then you spread some silky smooth peppermint chocolate guanche. Next you pipe on some velvety chocolate mouse and you top it off with a sprinkling of crushed peppermint. These cookies will not disappoint! The only problem with these cookies is that they tend to bring out the selfish side in people because once you taste these babies, you will want to eat them all yourself!
Here is a great recipe if you don’t like the tartness in a lemon meringue pie but love the lemon flavor. Growing up we always had a lemon meringue pie for Thanksgiving because it was one of my Dad’s favorite pies. I love lemons but the lemon meringue pies are too tart for me. When I tried this recipe, I thought it was the perfect compromise! It is also a pretty simple pie to throw together if you are in a pinch or just don’t want to spend a lot of time making a pie. This recipe is a keeper for sure!
Until next time,
Happy Eating!
Carrie

5 Ingredient Key Lime Pie is heaven sent! You will be floored at how such a simple recipe can taste so amazing! The filling is smooth and creamy and sets up beautifully in only 10 to 12 minutes. You can whip this 5 Ingredient Key Lime Pie up in under 20 minutes.

Key limes are hard to find where I live so I use regular limes. I also prefer to use homemade graham cracker crust and homemade whipped cream. I have included the recipes for homemade graham cracker crust and homemade whipped cream below. The homemade graham cracker crust and homemade whip cream are completely optional, you can use store bought if you prefer. It is a matter of personal preference.
I love this pie so much I created a recipe for Raspberry Custard Pie, Strawberries and Cream Bars, Apple Pie Cream Bars, and Easy Flag Cream Bars using the base of this recipe. They are also very simple and delicious! You can find the pictures and the links to the recipes at the bottom of this page.
The most popular recipe on my site is the Italian Lemon Pound Cake, if you love the sweet and tart combination of the 5 Ingredient Key Lime Pie, you should try this cake! I promise you won’t be disappointed!

With love from my kitchen to yours,
Carrie

One 9- inch prepared graham cracker crust
2 cans of sweetened condensed milk
1/2 c. sour cream
3/4 c. lime juice
1 tbsp. of fresh lime zest (about 2-3 limes), finely chopped
Recipe adapted from Key Lime Pie VII at allrecipe.com.
8 full sized graham crackers
1/4 cup of butter, melted
1/4 cup of granulated sugar
2 cups of heavy whipping cream
1 tsp. of vanilla
1 tbsp. of granulated sugar
Here are a few other recipes you should try.


Creamy Slow Cooker Mashed Potatoes is going to change the way you think about mashed potatoes. They are silky smooth and full of flavor. This make ahead recipe is as simple and easy as it gets!

There is just something about a bowl of Creamy Slow Cooker Mashed Potatoes. They always warm me up on cold days like today. I love all the memories I have as a child of sitting around the dinner table for Sunday dinner and enjoying a helping of my dad’s fluffy and oh so tasty mashed potatoes.
Mashed Potatoes is one of the most popular side dishes in United States. Really if you think about it, they can be enjoyed by people of all ages. Babies can start eating them around four months. You can eat them even when you are older and no longer have any teeth.
If you want a really creamy and fluffy mashed potato, I would recommend using a potato ricer. After all, if you whip or mix the potatoes too much you can turn them into a gummy mess. If you use a potato ricer, you will have a consistent creamy and smooth mashed potato.

I found a recipe for crock pot mashed potato recipe on Pinterest. It had never crossed my mind to cook the potatoes in the crock pot. I knew I had to try them to see if it would really work. After some tweaking, I have to say that I am in love! This recipe would be great for Thanksgiving dinner if you have a lot of things that you will need to be cooking on your stove top. I loved how flavorful the chicken broth made the potatoes. I felt that they really didn’t need a whole lot of spices added because they were so flavorful from the broth alone.
Once the potatoes were fully cooked, I put them through the ricer one large full ladle at a time. I didn’t bother straining the extra liquid. This way, I was able to keep the flavor from the liquid in the mashed potatoes and I didn’t have to use as much milk or sour cream.
If you don’t have the time to cook them in the crock pot, you can use this same recipe and cook them on the stove top. These potatoes are just as good the next day for leftovers. Go ahead, give it a try. I dare you to!
Until next time,
Happy Eating!
Carrie

5 lbs. Yukon Gold potatoes, peeled and cubed
1 tsp. garlic, minced
3 c. chicken broth
½ c. sour cream
½ c. milk, warmed
1 tsp. salt
¼ tsp. pepper
2 oz. light cream cheese
¼ c. butter
Instructions:
Here are a few other recipes you should try.


Autumn Havest Salad with Pumpkin with Creamy Pumpkin Dressing

This is the kind of pie that you can use as leverage to get things done around the house. The other day when I made this, my kids were all standing around drooling and waiting for the moment that they could devour their slice. They whined when I told them that they were going to have to wait till after dinner to eat it. It ended up working out great for me because during dinner I only had to tell them once that if they didn’t finish their food they wouldn’t get any pie. I have even considered making it every day just so I can get them to cooperate a little bit better when it comes time for homework, cleaning their room, and getting along with one another.
Easy Flaky Gluten-Free Pie Crust is simply magical. You shouldn’t let gluten stop you from enjoying a rich flaky pie crust. This quick and easy recipe will renew your faith in gluten-free recipes!

Pumpkin Cookies with Cream Cheese Frosting are my new favorite cookie. These cookies are what pumpkin is all about! The super soft Pumpkin cookies is the perfect match for the silky smooth cream cheese frosting. Autumn just isn’t the same without these cookies!

Ham and Egg Salad Breakfast Sandwich is best way to start your day! This sandwich is loaded with hickory smoked ham, hard boiled eggs, and cheddar cheese. It’s the perfect sandwich for breakfast, brunch, lunch, or dinner.

Simple Creamy Cheeseburger Soup is a soup that the whole family will love! It’s the classic all-American cheeseburger in soup form. This simple recipe is fool-proof and easy to follow so you will have more time to spend with your family outside of the kitchen.

Brown Butter Pumpkin Snickerdoodles will make your taste buds sing! These soft and chewy cookies are the best of snickerdoodles and pumpkin cookies wrapped into one.

Perfect Gluten-Free Sugar Cookies are so soft and chewy. The texture is unlike any other gluten-free sugar cookie recipe. These cookies are simple to make and the rich buttery flavor is astounding!

Peanut Butter Cookies are an all American classic and this recipe hits the nail right on the head. The peanut butter really shines in these soft and chewy cookies. This is a recipe you don’t want to miss.

Quick and Easy Homemade French Bread tastes better than any bakery bread. This recipe produces a soft and chewy bread that is the perfect addition to any meal.

Easy Sweet Buttermilk Cornbread with it’s moist and tender texture, buttery sweet flavor and slightly crisp edges, it’s no wonder we never have leftovers.
