Pressure Cooker Pork Tacos are easy to make and taste delicious! The pork is so tender that you can’t pull it out of the pressure cooker without the meat falling apart. The meat is juicy and dripping with flavor.
Loaded Baked Potato Soup
This Loaded Baked Potato Soup will rock your world! Just like the name says, it is loaded with flavor. It tastes just like a velvety soft baked potato with all the fixings. The soup is smooth and creamy with delicious chunks of potato, bacon, and green onions. The smooth, cheesy texture will leave your mouth watering and begging for more.
Stuffed Potato Footballs
Stuffed Potato Footballs are simply a must while watching the big game! You won’t find a better appetizer to help you root for your favorite team than these flavorful little spuds! Between the crispy skin and the cheesy bacon filling, I hear nothing but cheers from my kids when I make these Potato Stuffed Footballs.
Spinach Artichoke Dip
Spinach Artichoke Dip tastes just like the dip you would order at a restaurant. The creamy cheese with bits of spinach, artichokes, and green chilies screams deliciousness! I first made this dip years ago when I catered my neighbor’s wedding reception. I was hooked after the first bite.
Blueberry Streusel Muffins
These Blueberry Streusel Muffins are soft and fluffy. They practically melt in your mouth. The vibrant blueberry flavor pops in your mouth instantly. The muffins are rounded out perfectly with the streusel topping. I tweaked four different batches of muffins before I was able to get the texture and flavor just right. They look and taste just like muffins you would buy at the bakery.
Stir-Fried Sugar Snap Peas
This Stir-Fried Sugar Snap Peas recipe makes for an easy side dish for any meal. Seven minutes is all this dish requires until you can sink your teeth into these flavor packed peas. The natural sweetness of the peas goes perfectly with the vibrant ginger and savory garlic. The nutty flavor of the toasted sesame seeds creates the ultimate finishing touch.
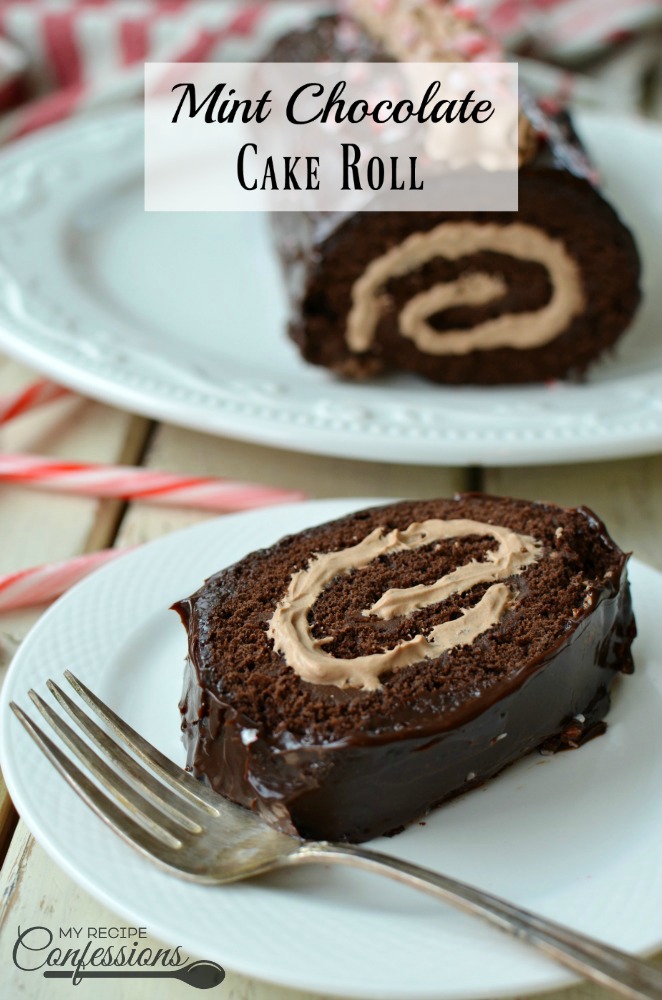
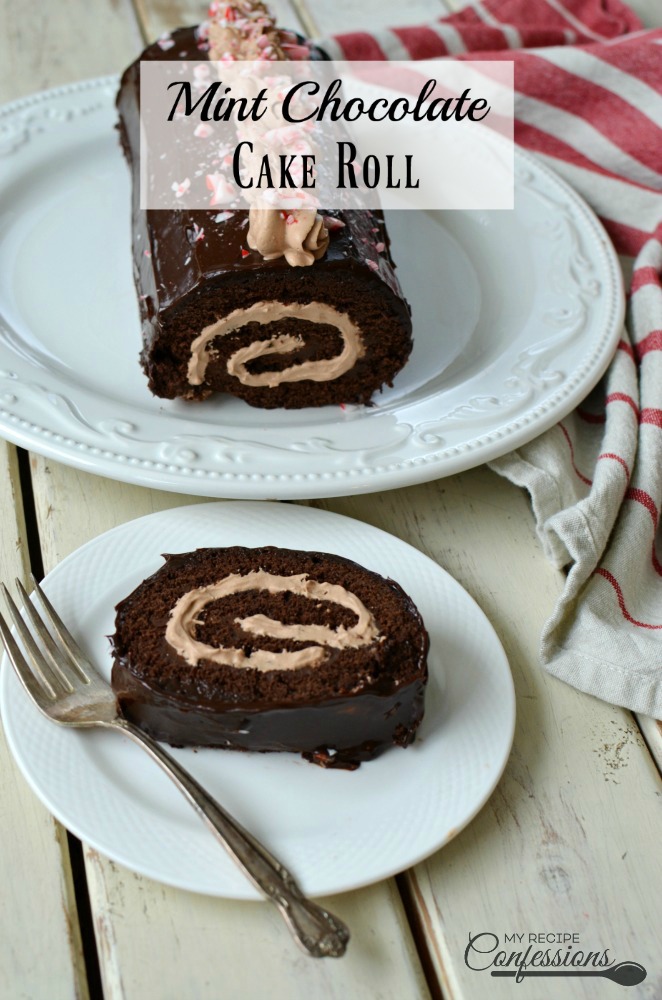
Mint Chocolate Cake Roll
Mint Chocolate Cake Roll is what dreams are made of! At least my dreams are anyways. I am a sucker for a rich, moist, chocolate cake. I hate to admit it, but I think about chocolate cake daily and this Mint Chocolate Cake Roll is just as amazing as it sounds
This moist chocolate cake is first filled with a smooth mint chocolate ganache and then a fluffy mint chocolate mousse. The cake is rolled up and then covered in more mint chocolate ganache. It case you were wondering, it is the most amazing cake ever!
If you know me, you know that mint and chocolate are my favorites, especially around the holidays. You can make this cake a day ahead. In my opinion, it tastes even better the next day.
With love from my kitchen to yours,
Carrie
Mint Chocolate Cake Roll
Cake
3/4 cup all-purpose flour
1/4 cup cocoa powder
1 tsp. baking powder
1/4 tsp. salt
5 large eggs, room temperature
3/4 cup granulated sugar
powder sugar, to aid in rolling the cake
Instructions
Pre-heat oven to 350 degrees.
1. Line a 18 x 13 inch rimmed baking sheet with parchment paper. Spray the parchment paper with cooking spray.
2. Whisk the flour, cocoa powder, baking powder, and salt together in a medium bowl.
3. In a large bowl, whip the eggs with an electric mixer on medium speed and gradually add the sugar and then the vanilla, about 1 minute. Continue to whip the mixture until very thick and voluminous, 4 to 8 minutes.
4. With the electric mixer still on, gradually add the flour mixture to the egg mixture.
5. Scrape the batter into the prepared baking sheet and spread it out in an even layer. Bake the cake until it feels firm and springs back when touched, 15 to 20 minutes or until a toothpick inserted into the center comes out clean. Rotate the pan halfway through baking.
6. Remove the cake from the oven. Lay a clean dish towel (I found a tea towel works best) out on the counter and dust with powder sugar. Holding onto the parchment paper, carefully remove the cake from the hot pan.
7. Place the cake face side down on the dish towel. Gently peel the parchment paper off of the cake. Starting from the short end, roll the cake and dish towel snugly into a log. Let the cake cool completely. While the cake is cooling, make the mint chocolate ganache and mousse.
Mint Ganache and Mint Chocolate Mousse
1/2 tsp. vanilla extract
1 (12 oz.) bag of semi-sweet chocolate chips
3 tsp. of peppermint extract
3 cups of heavy whipping cream
6. Place the chocolate chips in a medium-sized bowl. In a small sauce pan, bring 1 cup of heavy cream to a simmer. Pour the hot cream over the chocolate chips and stir until smooth and creamy.
7. Stir in 2 tsp. of peppermint extract into the chocolate ganache. Pour 1 cup of the ganache into another bowl. Cover both bowls of ganache with plastic wrap. Set one bowl of ganache aside and place the other bowl in the fridge to chill for the chocolate mousse.
8. Pour 2 cups of heavy whipping cream and the remaining 1 tsp. of peppermint extract into the chilled bowl of ganache. Whip until the mousse forms stiff peaks.
Cake Assembly
1. Unroll the cooled cake and remove the towel. Spread a layer of chocolate ganache over the cake. Spread a layer of chocolate mousse over the top of the ganache. Gently roll the cake up and place seam side down on a platter. Spread the remaining ganache over the cake. Add a little chocolate mousse on top of cake to top it off.
3. Sprinkle crushed peppermint candy on top if so desired. Keep the cake chilled until ready to serve.
Here are a few other recipes you might enjoy.
White Chocolate Peppermint Cookies
Flourless Mint Chocolate Cupcakes
Double Chocolate Candy Cane Kiss Cookies
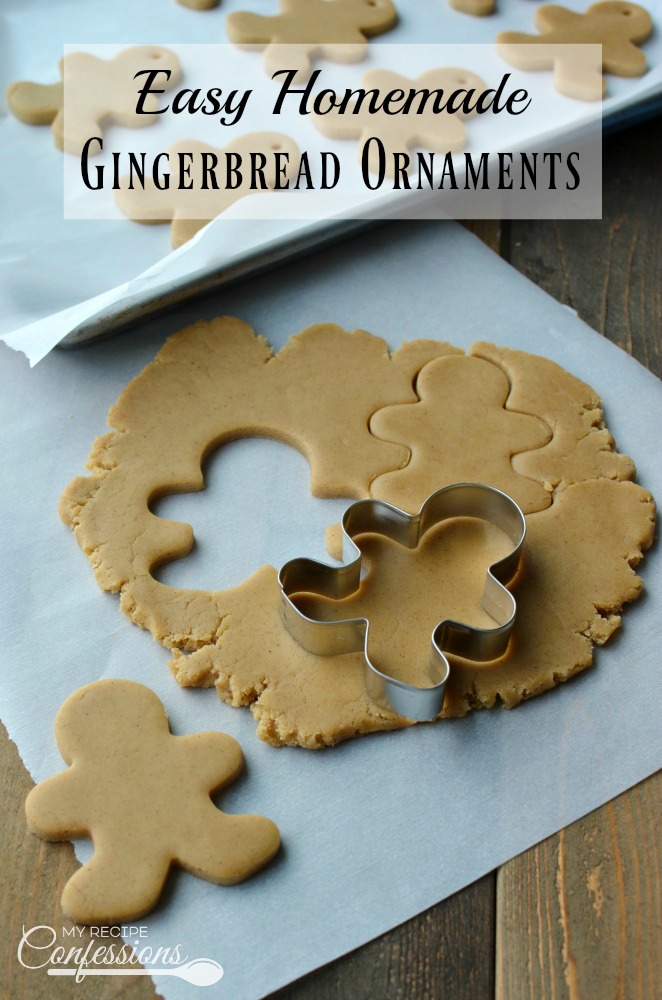
Easy Homemade Gingerbread Ornaments
Easy Homemade Gingerbread Ornaments are a fun Christmas craft to make with your family. I love how easy and kid friendly these ornament are. One batch goes a long way. This recipe can also be used to make a gingerbread house.
For a darker color gingerbread use dark brown sugar and dark syrup. When rolling out and cutting the gingerbread, make sure to keep the extra dough wrapped in plastic wrap because it will dry out quickly. If it does dry out, just place the wrapped gingerbread in the microwave for 30 seconds or until it is warm. Then continue working with the dough the same as before.
The ornaments are made the same way you make sugar cookies by rolling them out and cutting them with cookie cutters. My kids loved helping cut out all the fun shapes for their ornaments. They can be left plain or can be decorated with candy and royal icing (see recipe below). I know you will love the delicious aroma that will fill your house while you bake these ornaments.
With love from my kitchen to yours,
Carrie
Easy Homemade Gingerbread Ornaments
6 3/4 cups of all-purpose flour
1 tbsp. of cinnamon
1 1/2 tsp. of ginger
1/2 tsp. of ground cloves
1/2 tsp. of salt
1 1/2 cup of corn syrup
1 1/4 cup of brown sugar
1 cup of butter
Supplies:
Bakers twine or jute
Christmas cookie cutters
Plastic drinking straw
Instructions
Pre-heat oven to 350° fahrenheit
- Combine all of the dry ingredients except for the brown sugar in a medium-sized bowl and set aside.
- In a medium-sized sauce pan, combine the corn syrup, brown sugar, and butter together. Constantly stir over medium-high heat until the butter is melted.
- Stir the butter mixture into the flour mixture and mix well (you may have to use your hands when dough becomes too stiff to mix).
- Allow the dough to cool to room temperature. Roll the dough out to a 1/8″ thickness on parchment paper. Slide the parchment paper with the cookies on a baking sheet.
- Cut the dough with cookie cutters of your choice. Press a plastic straw into the top of the ornament to make a hole.
- Bake for 12 to 15 minutes or until golden brown. Check for air bubbles during baking. If there are any air bubbles, poke them with a toothpick or press it down with your finger .
- Slide the parchment paper with the hot ornaments onto a cooling rack. Make sure that all the ornaments lay flat. Allow to cool completely before decorating.
Royal Icing
2 cups of powder sugar
1/8 tsp. of cream of tartar
3 egg whites at room temperature (or 3 tbsp. of meringue powder and 3 tbsp. of water mixed together)
Instructions
- Sift the powder sugar to remove any lumps. Add the powder sugar and cream of tartar to egg whites while stirring.
- When all the sugar is incorporated, turn the mixer on high and beat mixture until it reaches a stiff peak.
- Cover icing tightly with a damp cloth or plastic wrap so the icing doesn’t dry out.
- If you would like to tint the icing, mix in a little food coloring at a time. It is best to use paste food coloring since liquid food coloring will change the consistency of the icing.
This recipe is adapted from Gingerbread Things to Make and Bake by Teresa Layman and Barbara Morgenroth
Here are a few other recipes you should try.
White Chocolate Peppermint Cookies
White Chocolate Peppermint Cookies are one of the best holiday cookies! They are soft and chewy with the perfect peppermint kick and the white chocolate is the perfect compliment. This recipe makes about 3 1/2 dozen cookies. So there will be plenty of cookies to share with your family or plenty to share at your next Christmas cookie exchange party.
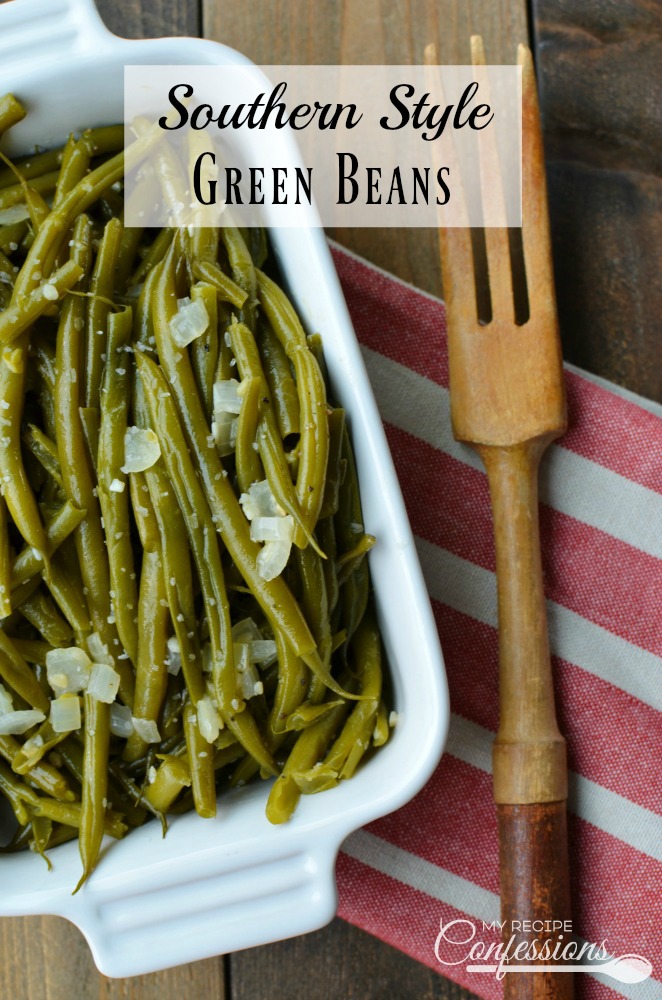
Southern Style Green Beans
Southern Style Green Beans are melt in your mouth tender delicious. Cooking the beans low and slow with a ham hock gives these beans an irresistible subtle smoky flavor that really can’t be beat!
This Southern Style Green Beans recipe is my favorite way to cook green beans! I love the smoky flavor from the ham hock. The aroma that filled my home when I made these beans was irresistible! So not only will your house smell incredible, but you will have a dish that is so good it will make you want to cry it is that delicious!
I have always loved green beans. We ate them a lot growing up. I remember picking beans in my grandparents garden and our own garden at home. After we had picked the beans, we would help my mom wash, snap, and bottle the green beans.
For Sunday dinner we would open a bottle of green beans and a can of cream of mushroom soup. We would mix the two together, heat them up, and serve them. I think we had green beans with cream of mushroom soup pretty much every Sunday. We usually had roast beef and mashed potatoes with gravy as well.
You know that saying, “Good things come to those that wait”! Well, that definitely applies to these beans. Yes, you simply can just open a can of green beans, throw them in a bowl, and heat them up in the microwave and be done. However, if you are willing to wait a little bit longer while the beans slowly simmer with the ham hock, you will be greatly rewarded!
With love from my kitchen to yours,
Carrie
Southern Style Green Beans
2 lbs of fresh French green beans, washed and trimmed
1 ham hock
6 cups of water
1 medium onion, diced
2 tsp. of garlic, minced (about 2 cloves)
1 tbsp. of butter
1 tsp. of kosher salt
1/2 tsp. of black pepper
Instructions
- Place the ham hock, beans, and 6 cups of water in a large pot. Cover with lid and bring to a simmer over medium heat. Simmer for 1 hour until beans are tender.
- In a large skillet over medium-high heat, saute the onion and garlic in the butter until tender and translucent. Add the beans into the skillet. Sprinkle the salt and pepper over the beans. Gently toss the beans to combine.
Here are a few other recipes your might enjoy.
Creamy Crock Pot Mashed Potatoes
Autumn Harvest Salad with Creamy Pumpkin Dressing
- « Previous Page
- 1
- …
- 4
- 5
- 6
- 7
- 8
- …
- 46
- Next Page »
